Showing posts with label recipes. Show all posts
Paleo Eggs Benedict (Plus Bonus Guacamole Tip)

Paleo Eggs Benedict (Plus Bonus Guacamole Tip)


Paleo Eggs Benedict


I cannot think of a time in my life when Eggs Benedict wasn't a favourite. When I was hit with an autoimmune a couple of years ago I had change my diet in a hurry and relearn how to make my non-negotiable menu items. This was at the top of my list! 

While figuring out how to do away with the English muffin, the second problem I had was the eggs. I LOVE eggs, but too many and my body was once again spiralling into a state of inflammation. So, my problem-solving skills in the Eggs Benny department became: 

1.) What is a reasonable substitute for an English muffin?
and
2.) What can I use instead of hollandaise to cut down on the egg content in a heavy eggy dish?

After a few failed attempts, I ended up keeping it simple by using sweet potatoes for my "muffin", and putting some good ol' fashioned guacamole on top instead of hollandaise. Side note: keep reading for a guac recipe that will make your guests want to lick the bowl. Seriously...sometimes I just make it to eat!

But because I don't believe every recipe needs an essay...here's the quick and simple, let's get 'er done directions...

Ingredients:

  • sweet potatoes (see directions to determine how many you'll need). Choose the fattest ones you can find as you will be slicing them like a loaf of bread for your base.
  • bacon strips...because strips are always better than back bacon...am I right?! I use 1 slice per benny)
  • 1 bunch of asparagus 
  • 1/2 lemon worth of zest
  • eggs (one per benny)
  • 2 avocados 
  • 1 head of garlic
  • 1/2 lemon worth of lemon juice
  • salt and pepper (to taste)
  • Olive Oil
Because I'm pretty sure at least some of this will be a no-brainer for you, I've broken down the directions in pieces. Skip over what you know, and use the rest to walk you through the process.

Directions for the sweet potatoes:

  1.  Preheat your oven to 425F
  2.  Peel your sweet potatoes and cut them about a half an inch thick. 
  3.  Lay your potatoes on a baking sheet (single layer, don't overlap) and brush them with a generous layer of olive oil.
  4.  Put them into the oven and bake for 20 min. before flipping. Once flipped keep an eye on them. The goal is to bake them until the edges start to caramelize (AKA- turn brown), at which point you can take them out and plate them. 
**Each potato slice will be the equivalent to half an English muffin, so you'll need to use as many potatoes as you need to get however many "muffin halves" you need.

Directions for the bacon:

  1. Once your potatoes are in the oven, place your bacon on a tin foil lined baking sheet and also place in the oven, flipping halfway through the process. 
**bacon is tricky to include in a recipe in the oven. Cook time can vary depending on bacon thickness. I just make sure to check on it every 5 minutes or so, and flip it after about 10 minutes.

Directions for asparagus:

  1. Snap the ends off your asparagus and steam for a few minutes until tender soft (either in a pot with a little water, or in the microwave). 
  2. Once cooked, toss in a little olive oil and the lemon zest and set aside until assembly.

Directions for eggs:

  1. You could poach your eggs, but it's rather time consuming and fussy, so I usually just cook our eggs into a frying pan with a little olive oil until they are over-easy. We like our yolks to drip onto the plate for extra flavour.

Directions for best guacamole ever!

Here's the key to the best guac ever...roast your garlic first! Here's how...
  1. Cut the top of your garlic off and peel back the loose layers of the bulb leaving only the inner layers to hold the bulb together.
  2. Drizzle on some olive oil over the exposed cloves and then wrap your bulb in tin foil. 
  3. Put on the bottom wrack of your oven as you cook your sweet potato and bacon.
  4. Once your potatoes are cooked, your garlic should be done too. 
  5. Remove your garlic cloves from the head and mash (and yes, I use the whole bulb when I cook...I LOVE garlic...thankful so does my family so we can all smell together!).
  6. From here it's just standard guac...(2 mashed up avocados, lemon juice, all the garlic from the bulb, salt and pepper).

Directions for assembly:

You really can take liberties in whatever order you like here, but I layer mine in the following order: sweet potato, bacon, 4-5 pieces of asparagus, egg, guacamole.

Enjoy your eatin' folks! 

Do you have a old favourite that you've revamped for your dietary needs? Want to share it? Email me at hello@likegrandmadid.com and I'll include your recipe in a future magazine edition. 

All my love,
Read more »
Like Grandma Did
0 Comments
Homemade Laundry Detergent

Homemade Laundry Detergent


Homemade laundry detergent

After having our third child I realized almost immediately that we would need to change our laundry habits. We were going through a ton of laundry and washing our clothing too often. The most obvious course of action was to downsize our clothing and linens. I paired down our closets, went down to the minimum amount of linens we could get away with, and gave everyone a laundry basket to keep things organized. If I didn't have time to fold in those early baby days, you could at least find your clean clothing in your labelled basket on the shelves my father-in-law graciously built in our laundry room. 

Once we had paired down, the next step was management of the water. Five people means a lot of water gets used in a day. Figuring out showers/baths, dishwasher, and laundry felt like a bit of a task to conquer. I designated shower days/times and laundry days to help us out. The dishwasher needed to run every night so we needed to work around it. Still today, we all have our laundry days, and you need to get in and get out in your allotted time. In case you were curious, two out of three of my kids (ages 11 and 14) now do their own laundry, and my five year old is in training to do his own as well. 

Next up came the frugal factor of the cost of laundry soap, not to mention I'm not a fan of the chemicals in store bought soap. After doing a little digging I came across a homemade laundry soap on the Duggar's blog. I figured if it worked for their giant family, why not give it a shot. I have since adapted it slightly to our hard water. It is this recipe that I wish to share with you today. 

Ingredients:


- 1 - 1/12 bars of laundry soap (Sunlight is easy enough to find, but if you want something more natural try your local health food store for bars of laundry soap. This time I tried the laundry bar from Rocky Mountain Soap, and so far I really like it!)

- 1 1/2 C washing soda (This will vary depending on your water softness. Use less for soft water as this amount is set for those of us with hard water)

- 1/2 C borax

*you will also need a 5 gallon bucket with a lid.


Directions:


1. Grate the full bar of soap (plus half from another if you know your clothing will need an extra boost).

2.  Fill a pot of water with 4 C of water and add your grated soap.

3.  On medium heat, continually stir the soap until it melts into the water

4.  Fill a 5 gallon bucket with hot tap water then add your soap mixture to the bucket.

5. Add in your borax and washing soda and mix until it's all dissolved (be sure to scrape the bottom of the bucket).

6. Fill your bucket to the top.

7. Allow to cool over night.

8. The next morning give your laundry soap a big stir (depending on what type of soap you used it may gel, that's perfectly fine, just stir it extra good).

9. You can now add essential oils if you wish, but we usually left ours fragrance free. Make sure you give it a good mix if you're doing this so you avoid staining your clothing.

To use:


Before I use ours I just give it a quick stir to mix up any separation that has occurred.

Use the same amount of this laundry soap as you would the store-bought.

One final note, it has been really important to me that our laundry always gets an extra rinse, as it helps to wash away any residual soap that may irritate the skin. 

And there you have it! Your own homemade laundry soap!

Know any other good laundry recipes? Drop me a link or share below.

All my love,


Read more »
Like Grandma Did
0 Comments
Homemade Diaper Rash Remedy

Homemade Diaper Rash Remedy


Homemade diaper rash remedy

This week I took a trip down memory lane with old photos of our growing family. Can I just say, I miss the days of little pudgy fingers, chubby cheekies, and gooey chins?! *sigh* But I digress...

What transpired from my little reflective trip was remembering all the efforts it takes to create a healthy space for babies. With our last child, I finally got brave enough to use cloth diapers (read: I finally didn't feel like I was drowning in the newness of motherhood enough to handle another new thing in my world). Since cloth diapers work a little differently than the gel packed store-bought diapers, "bottom dampness" was a real battlefield. 

Thankfully, I have well-seasoned, earth mama friends who tipped me off on a secret I am about to share with you. Ready for it?

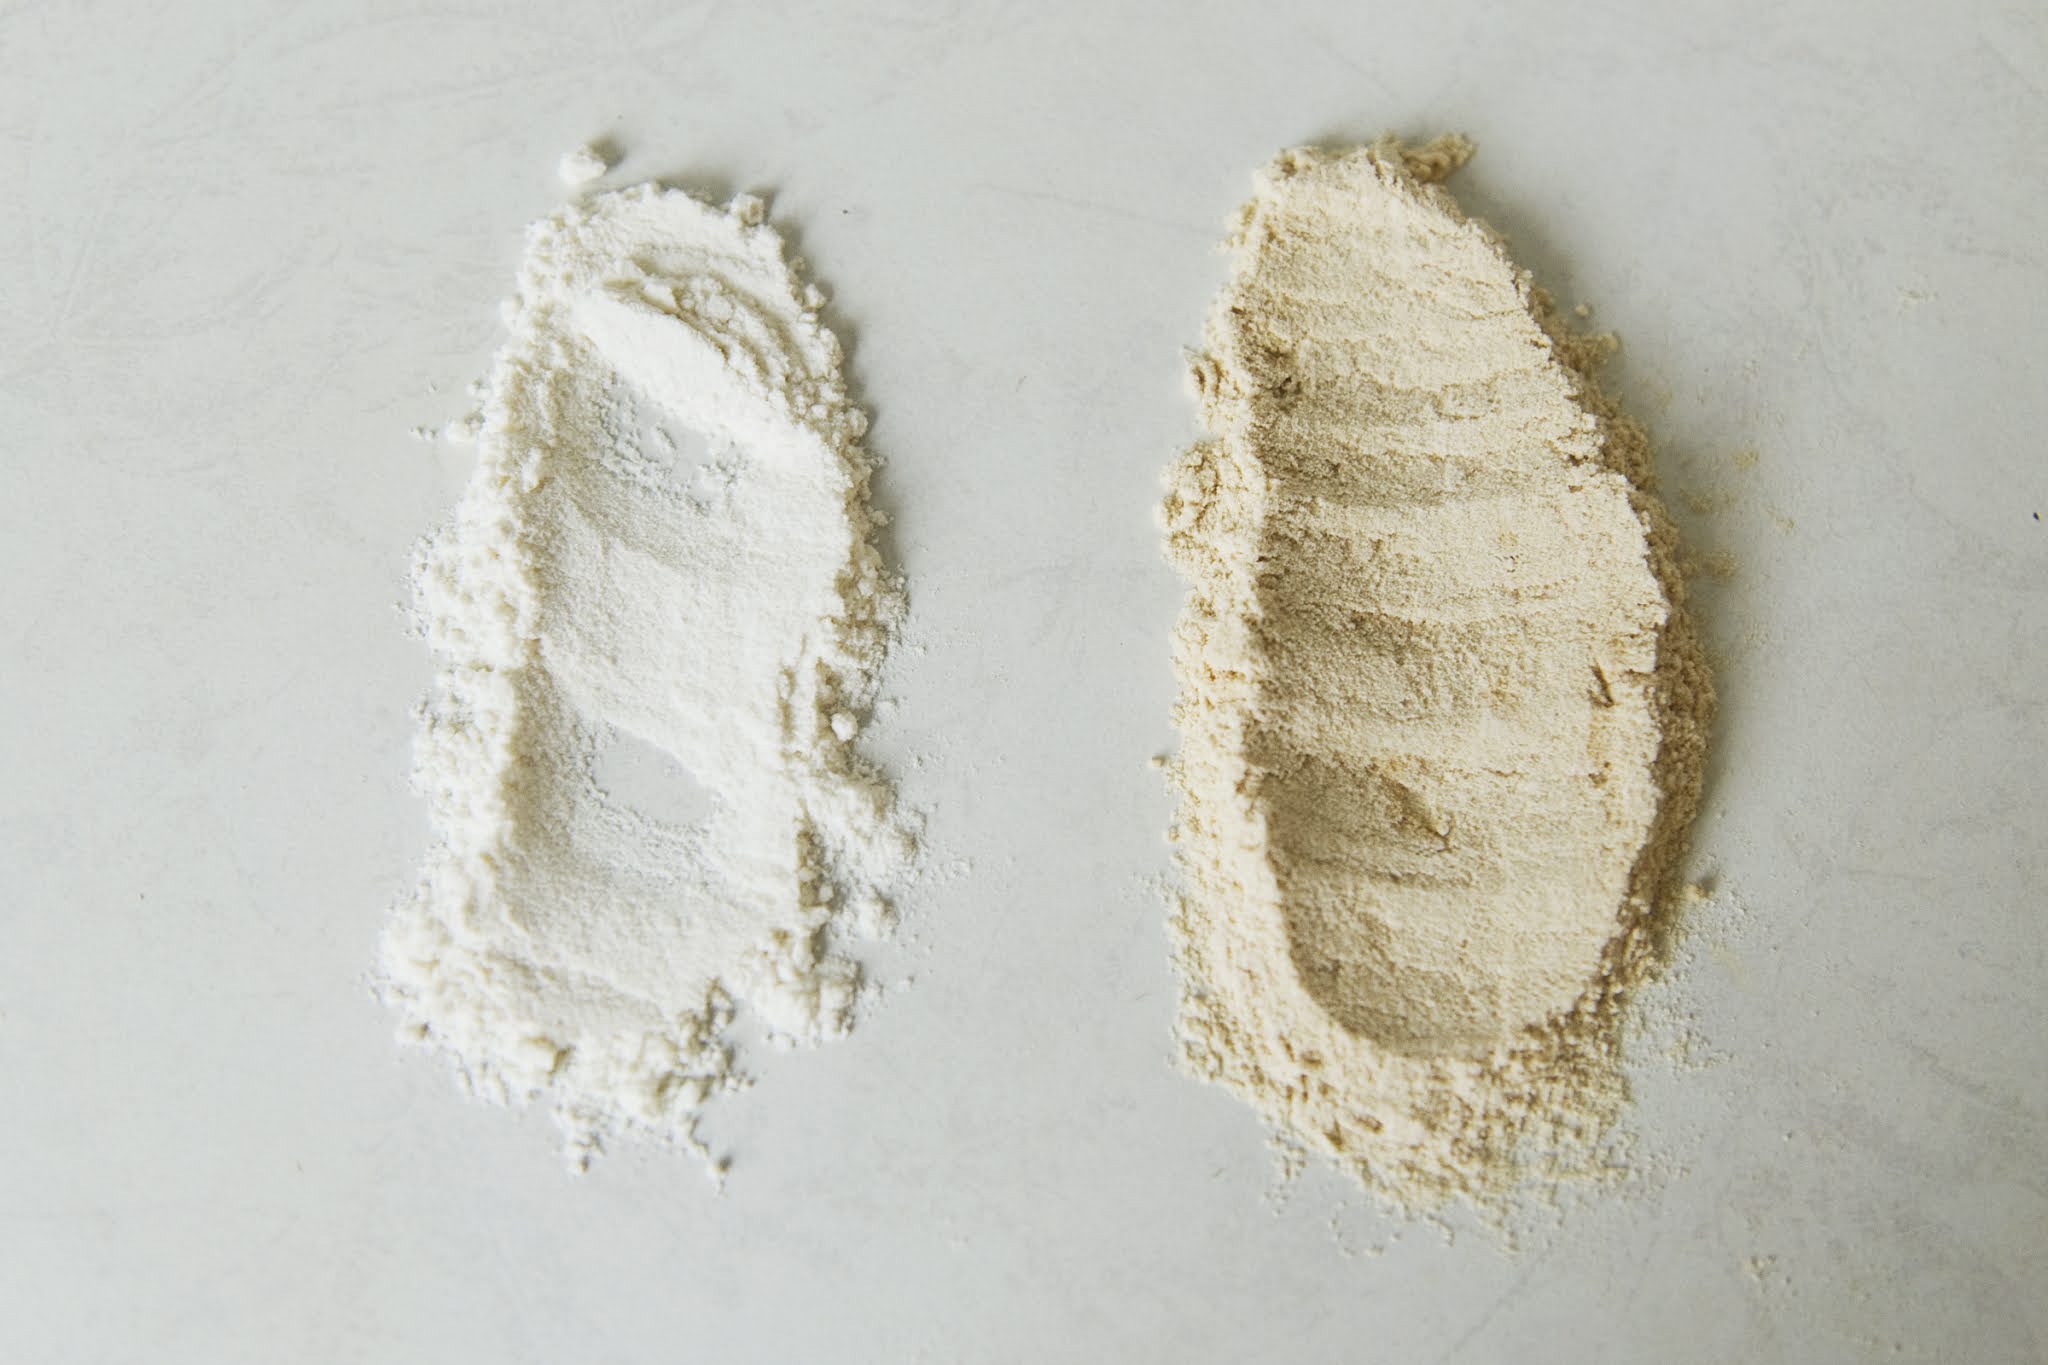
Browned flour.

Pretty exciting, hey?! We used every cream on the market (including a few prescriptions once or twice), but at the end of the day, it was browned flour that finally helped us win at the game of diaper rashes. Not only did it work, but it's cheap too! (Remember, I'm a pinching tight wad, see former post for a refresher on that.).

But Sarah, what is browned flour?

Browned flour, not to be confused with whole wheat flour, is simply white flour that has been cooked in a frying pan. Here's how you make it:

1. Find yourself plain white, unbleached flour (if possible the non-enriched kind, although that is a detail I learned after the fact, and it didn't seem to bother our baby's skin).

2. Toss the desired amount into a frying pan or pot (I usually used about a cup at a time since I only made enough to use quickly to avoid it going stale).

3. Turn your heat to medium and begin to move the flour around your pot (do not put anything other than your flour in the pan). 

4. It will seem like it's taking forever, and then suddenly the flour will begin to darken quite quickly (and it will smell pretty awful too!)

5. Once the flour is brown, set it in a container and leave to cool before using on your baby. 

You do not need to add anything to the browned flour, simply use it as it is. I used a little of mine every time I did a diaper change, and a good dusting after bath time (let your baby air dry a bit before strapping on a diaper and "dusting", it will make a huge difference!)

If your baby us really struggling, take them to the doctor as they may need a prescription strength cream to knock it back. Once it's under control, switch to browned-flour as a preventative measure to keep that pesky rash from returning. 

There you have it! An all-natural remedy to diaper rash! Enjoy.

All my love,


Read more »
Like Grandma Did
0 Comments
Apple Cider Vinegar Hair Rinse

Apple Cider Vinegar Hair Rinse


Apple Cider Vinegar Rinse


This post contains Amazon Affiliate links. By making purchases from the links in this post, I may earn a small portion of the sale at no additional cost to you. You will not be charged simply by clicking on a link. 


I am a huge fan of apple cider vinegar, or ACV as it’s known in its shortened form. This summer I tried my hand at making my own ACV and had great success (but more on that in a different post). Originally, I made the switch to ACV for my food because of its fermented properties that give it a probiotic kick (assuming you are ingesting some of the “mother”). I am all about healing my gut right now, so I take any help I can get!


Aside from being good for your gut, ACV is also great for your skin! I am allergic to just about every single shampoo and conditioner on the market right now since most have fillers that upset my system be it in or on my body. I’ve had to get crafty with homemade tinctures and creams to keep me clean and healthy! Enter ACV…


About once a week I use an ACV rinse in my hair (a little less in winter when the air is already dry)! My kids think I smell like a salad on vinegar wash days, but my hair looks fantastic! It’s shiny, the frizz is under control, and in general looks and feels healthy. The other bonus is that I can usually get away with not needing to use shampoo for about 2 days after since it works to balance your pH. 


So why ACV for your hair? Here are a few reasons:


1. It helps to balance your skin's pH, which is great for us oily people!


2. It contains probiotic which can help with the flora on your skin (yes, even your scalp contains tiny micro-organisms working to keep you healthy.) 


3. It strips the products from your hair that build up over time on the hair shaft and at the scalp.


4. In light of reason #3, it is much cheaper than clarifying shampoos!


5. It doesn’t contain harmful ingredients that are often found in store-bought hair products like (phthalates and parabens to name a few).


It’s important to note that ACV is an acid, so as many benefits as it has, it still needs to be used in moderation. "Less is more" definitely works in this case. If you are looking for an ACV shampoo and conditioner than can be used for more daily usage, check out the ones I use here. 


    Here’s how I use my rinse so you can make your own too. If you aren’t making your own vinegar, then head to the store and grab yourself an ACV that contains the “mother”. The mother is the bacteria and yeast that grow during the fermentation process and contains what we need to give our own flora a boost. At present, Costco sells giant jugs of it that do in fact have the “mother”, or you can use Bragg Live Food Organic Apple Cider Vinegar.


Step 1: Give your bottle a shake to stir up the mother that is probably sitting at the bottom of the bottle.


Step 2: Pour 1-2 Tbsp into a glass or mason jar. (Use the lesser if you aren’t an oily person, and more if you are).


Step 3: Fill the remainder of your container with warm water.


Step 4: Wash your hair as you ordinarily would. 


Step 5: Slowly pour your vinegar rinse over hair making sure you get your scalp all the way to the ends of your hair. (pro tip: careful you don’t accidentally pour it in your eyes…voice of experience speaking here!)


Step 6: Work the rinse into your hair and scalp like you would with your shampoo (I say like shampoo rather than conditioner because I tend to only put conditioner on the ends of my hair since it’s too greasy to put at the root. This is not the case with ACV rinse, you actually want it right down to the root.)


Step 7: Leave the rinse in your hair while you finish your shower.


Step 8: Rinse out the ACV and towel dry/ style as you normally would.


On ACV wash days, I give my hair a break from the blowdryer we well, and just let my hair and scalp have a day to breath.


That’s it! It’s that simple! Let me know what you think in the comments. What are you using ACV for? Share your ideas below!!


All my love,


Like Grandma Did


Read more »
Like Grandma Did
0 Comments
[name=Sarah Slanzi] [description=Old-fashioned homemaking steeped in God's grace] (facebook=https://www.facebook.com/hiddenmotherhood) (instagram=https://www.instagram.com/sarah.slanzi) (pinterest=https://www.pinterest.ca/hiddenmotherhood/)